Topics -> flask, python, tweepy, scraping, webdevelopment, bot, twitter,api
Preview Link -> FlaskTweepy
Source Code Link -> GitHub
What We are going to do?
- Initializing the flask api.
- Getting user info and tweets from Tweepy library
- Rendering on frontend
What is Flask framework?
Flask is a micro web framework written in Python. It is classified as a microframework because it does not require particular tools or libraries. It has no database abstraction layer, form validation, or any other components where pre-existing third-party libraries provide common functions.
How to install required libraries?
pip install tweepy
pip install Flask
Step 1 -> Initializing the flask api
Once Flask and Tweepy are installed then we need to import and intialize the flask app
import tweepy
from flask import Flask, render_template

app = Flask(__name__)
Step 2 -> Getting user info and tweets from Tweepy library
First get the twitter api keys from Twitter developer account.
Once we got the keys and other credentials, we are ready to go.
Variables Initialization
Note : - Please enter your details.
consumer_id = ""
consumer_key = ""
callback_uri = "oob"
ACCESS_TOKEN = ""
ACCESS_TOKEN_SECRET = ""
auth = tweepy.OAuthHandler(consumer_id, consumer_key, callback_uri)
auth.set_access_token(ACCESS_TOKEN, ACCESS_TOKEN_SECRET)
api = tweepy.API(auth)
Here we declare the twitter client using OAuthHandler.
Defining profile route and handler
@app.route('/user/')
def username_tweets():
    me = api.me().screen_name
    return render_template('user.html', user=me)
render_template takes two argument that takes template name and data to pass to jinja templating engine / frontend
Defining tweets route and handler
It will get the user tweets from the user timeline.
@app.route('/tweets/')
def get_tweets():
    my_timeline = api.home_timeline()
    twitter_data = []
    col_header = set()
    allowed_types = [int, str]
    for status in my_timeline:
        status_dict = dict(vars(status))
        status_key = status_dict.keys()
        single_tweet_data = {"user": status.user.screen_name, "author": status.author.screen_name}
        for k in status_key:
            v_type = type(status_dict[k])
            if v_type in allowed_types:
                single_tweet_data[k] = status_dict[k]
                col_header.add(k)
        twitter_data.append(single_tweet_data)
    return render_template('tweets.html', tweets=twitter_data)
Step 3 -> Rendering on frontend
Base template
Every webpage has some common similarities like navbar, footer , and banner. So we have created a base template.
<!DOCTYPE html>
<html lang="en">
<head>
    <meta charset="UTF-8">
    <title>Home</title>
    <link rel= "stylesheet" type= "text/css" href= "{{ url_for('static',filename='css/home.css') }}">
    {% block css %} }}{% endblock %}
</head>
<body>
{% block body %}
{% endblock %}

</body>
</html>
Tweets template
{% extends 'base.html' %}
{% block css %}
<link rel="stylesheet" href="{{ url_for('static',filename='css/tweets.css') }}">{% endblock %}
{% block body %}
    <h1>Tweets List</h1>
    <div class="tbl-header">
        <table class="product">
            <thead class="tbl-header">
            <tr>
                <th>URL</th>
                <th>ID</th>
                <th>Text</th>
                <th>Retweet Count</th>
            </tr>
            </thead>
        </table>
    </div>
    <div class="tbl-content">
        <table id="product-table-body">
            <tbody>
            {% for tweet in tweets %}
                <tr class="product-row">
                    <td>
                        <a class="product-title" href="{{ tweet.source_url }}">{{ tweet.source_url }}</a>
                    </td>
                    <td>{{ tweet.id }}</td>
                    <td>{{ tweet.text }}</td>
                    <td>{{ tweet.retweet_count }}</td>
                </tr>
            {% endfor %}
            </tbody>
        </table>
    </div>

{% endblock %}
We have made a table and used a jinja loop to get the data from the tweets queryset.
User Info Template
{% extends 'base.html' %}
{% block css %}
    <link rel="stylesheet" href="{{ url_for('static',filename='css/user.css') }}">
{% endblock %}
{% block body %}
    <div class="head">
        <h1>Welcome {{ user }}</h1>
        <a> href="{{ url_for('get_tweets') }}" class="btn-hover color-7 next-btn">Click Here To view Tweets</a>
        <h3> Flask Starter Pack modified With Tweepy</h3>
    </div>
{% endblock %}
You can add styles to make it attractive.
How to run our server :-
- First of all, install all the dependencies by `python3 install -r requirements.txt` in the cmd.
- Then run the following commands to run the server : -
flask run
Deployment
You can easily deploy on Heroku
You can read more about on GeeksForGeeks Blog
Web Preview / Output
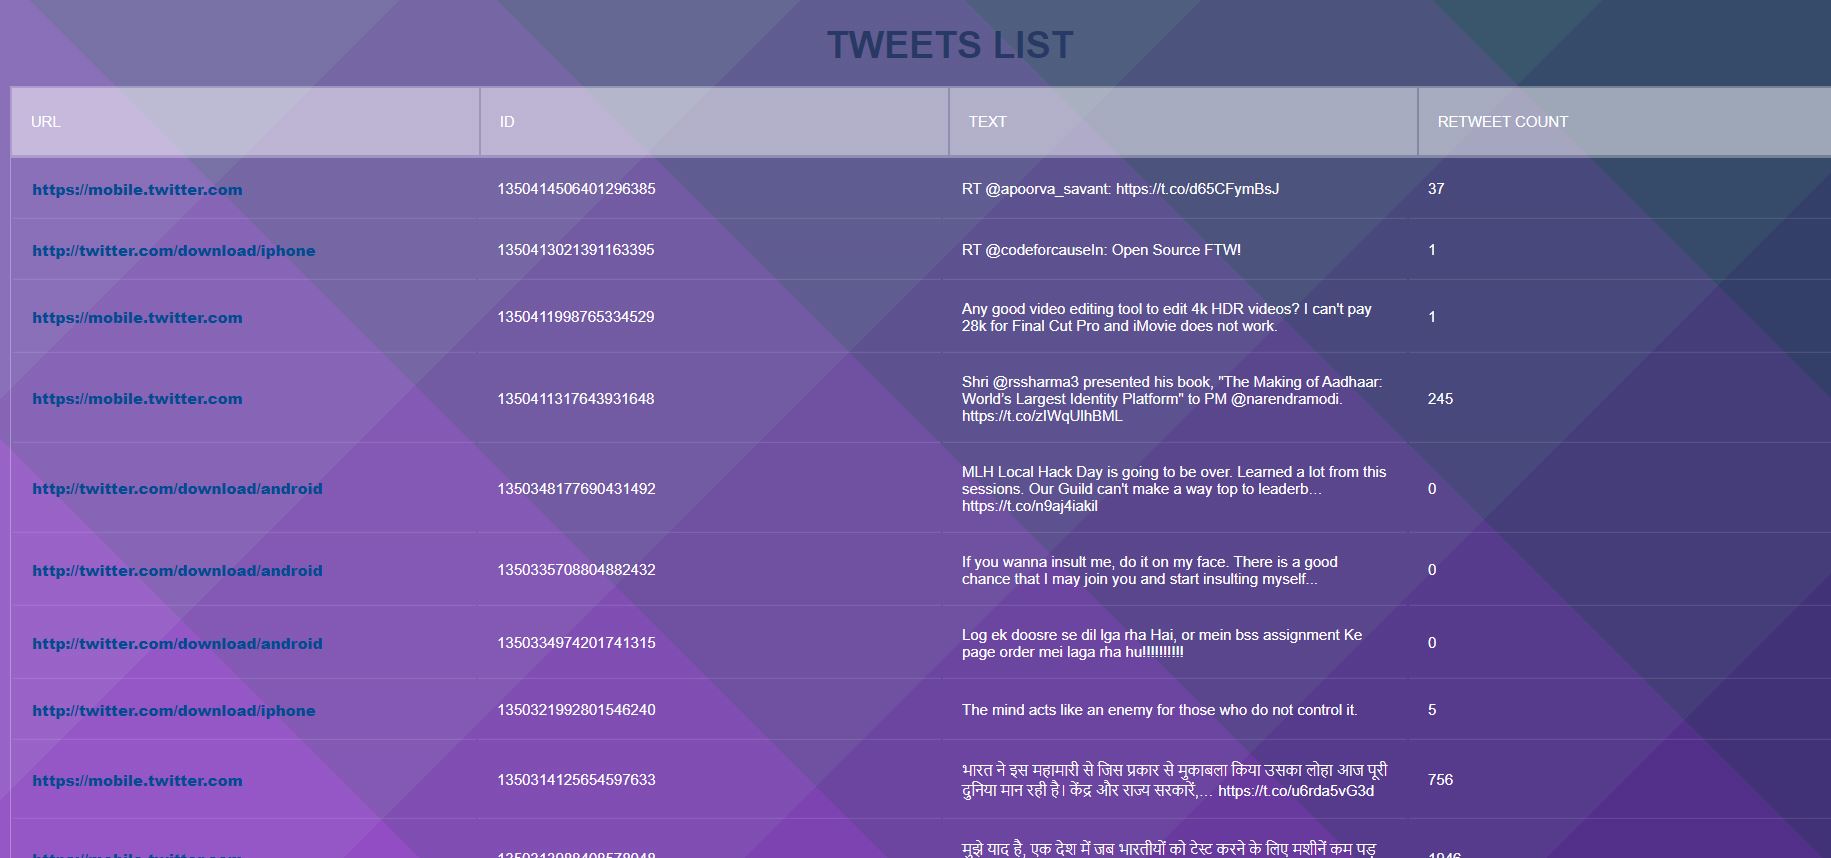 Web preview on deployment
Placeholder text by Praveen Chaudhary · Images by Binary Beast